Technology | 6 Minutes Reading
Find Where Image Was Taken & Get the GPS Coordinates of A Photo


Billions of photos are clicked every day. Moreover, these digital snapshots are more than just a form of storing memories. Hidden behind the pixels is a treasure trove of useful information. This information is often used to find where image was taken, among other things.
However, people who are new to digital forensics may find it difficult to extract GPS data from photos. Therefore, we here attempt to remove all hurdles that may come in your way via this write-up.
In this easy-to-follow tutorial, you get instructions on two separate methods to access the geospatial coordinates of the image. So that you can complete your investigations in no time. Before that, let’s see from where exactly we get this data.
Prerequisites to Get GPS Coordinates from Image During Analysis
The key to finding where image was taken lies in its EXIF data. For those unfamiliar with the term, it stands for Exchangeable Image File Format.
While it might seem like a technical language, it’s quite helpful in revealing the “who,” “what,” “when,” and “where” of the captured moment.
Who: Although EXIF data does not reveal the person who took the photo. The entire information about the equipment that was used to click the pic is available to the investigators. This includes the Aperture Size, Shutter Speed, Focal Length, ISO speed, etc.
What: Using the EXIF file, investigators can identify what exactly a picture represents. By this, we mean whether the pic was in landscape or portrait. Its dimensions, format, and resolution all are present inside the EXIF metadata.
When: The timing of the photo is crucial in solving crimes. So the fact that EXIF data contains this information about the photo is quite helpful. Detectives can get the time of the image down to the last minute.
Where: Both the Latitude and Longitude of the image will be present if the device on which it was taken has its GPS on.
However, one should not make the mistake of believing that just because we have a digital image, we also have its EXIF data. EXIF data, unlike Hash values of any digital data, is optional.
Sometimes software programs may themselves change the EXIF value or even remove it entirely. Deliberate removal of EXIF data is more common than automatic removal.
Even when the EXIF data is missing, it tells us many things, like that the person wanted to hide something. The picture may be fake or AI-generated.
So once we learn what to look for, we can easily find what we need.
Find Where Image was Taken Manually
- Go to the file where you have kept an image and right-click on it.
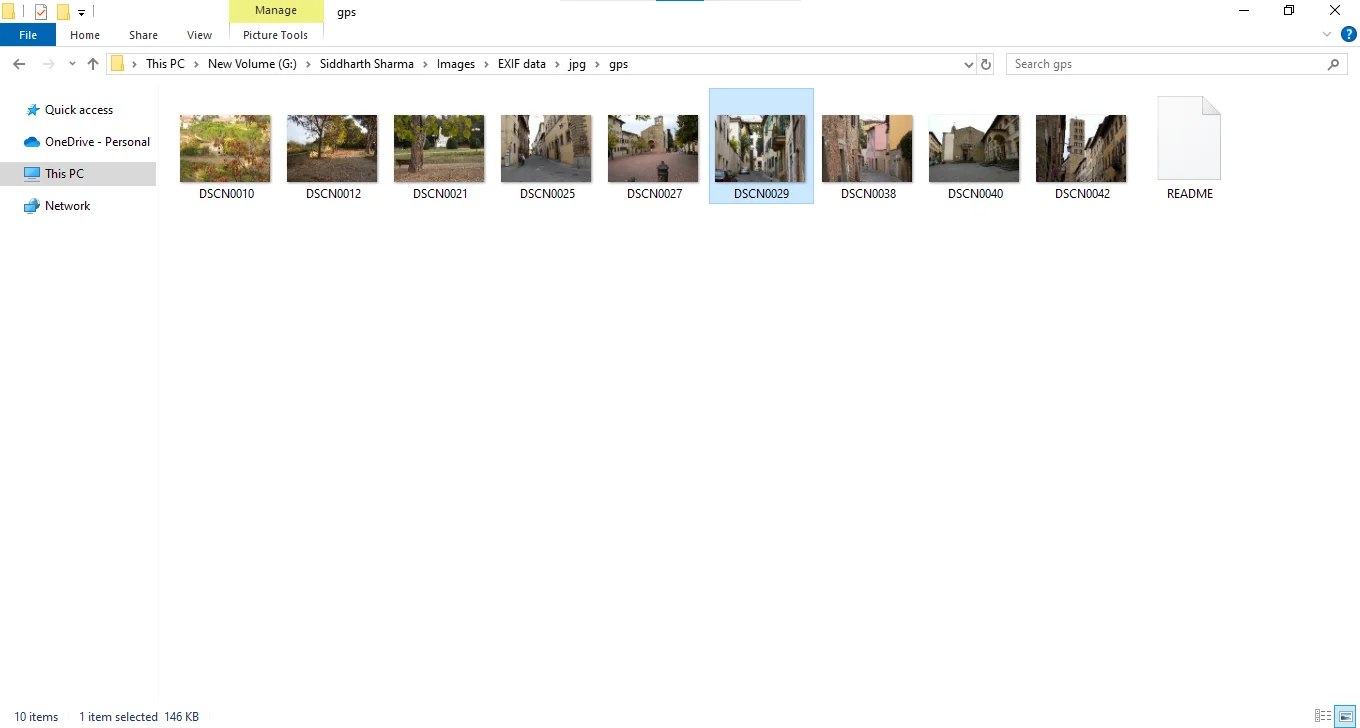
- It opens a pop-up menu. Find and click on the Properties tab.

- Then, in the new window, go to Details and scroll until you see the GPS section.
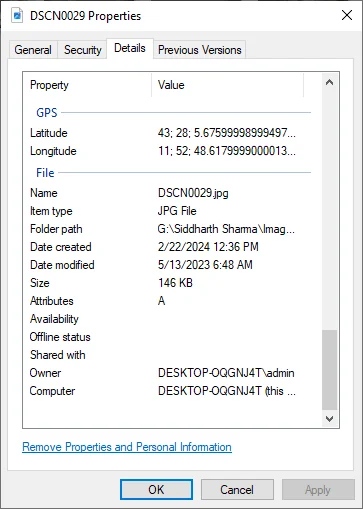
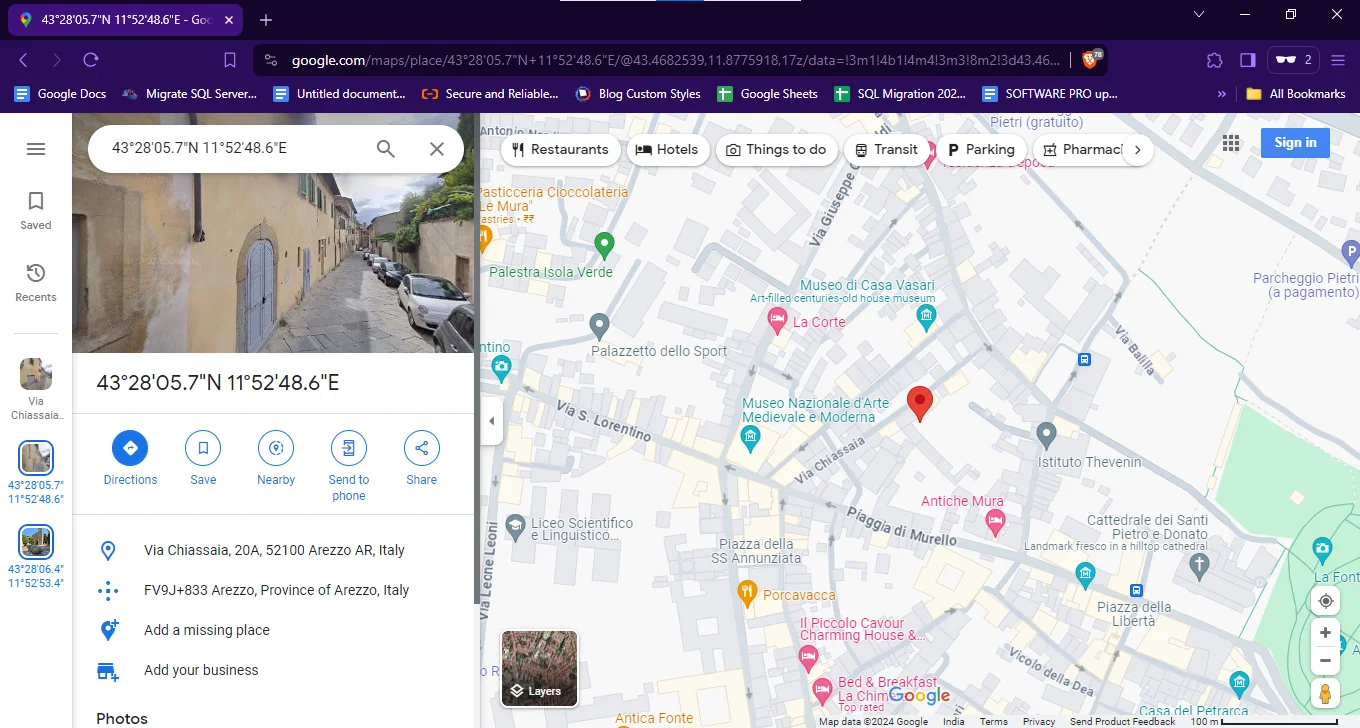
- The properties window does not allow copy-pasting. So keep this tab open and type in the coordinates manually on an external platform like Google Maps.
- Repeat the steps to extract GPS data from all photos in your possession.
Sometimes EXIF data may be manipulated, like during a Whale Phishing attempt. It may also get damaged in such scenarios that it’s not possible to identify a location from a photo. However, this in no way means that you should discard the images whose coordinates are unavailable. Even genuine images, like screenshots, contain no EXIF data to begin with.
During major investigations, digital evidence is just part of the puzzle. Moreover, detectives may have hundreds, if not thousands, of photos to analyze. So even if a few of those images contain the EXIF data necessary to find where the image was taken. Investigators can get closer to apprehending the victim.
The real problem is the sheer volume of data. Therefore, digital forensics investigators should rely on a solution that can bypass these repetitive and time-consuming tasks altogether. That’s exactly what we are about to discuss next. So without further ado, here is the solution.
Extract GPS Data from Photo En Masse
The utility that sits at the forefront of all digital forensics investigations is none other than MailXaminer. With its ability to handle image data from a variety of sources, it is all you require to find where the image was taken.
It gives you freedom from the confusing EXIF data by arranging it in a neat, easily readable format. Moreover, co can select and copy the coordinates to
Thus eliminating the errors that occur due to manual typos. You can contact us and schedule a demo with just a few simple clicks. Try out and see how you like the modern approach over the traditional one.
Note: If you can’t find the GPS coordinates, then it means that your image does not have them. In this case, there is no way to find where the image was taken by any means possible. You must rely on other metrics for the digital forensic analysis of your photo.
Steps to Get GPS Coordinates from Image
Follow these instructions when you have a copy of the tool available to you.
- Open the tool > Create a new case, and input the data in ZIP format.

- Once the Data is available, go to the search section.

- To find where the image was taken click on the photo and view the Properties option.
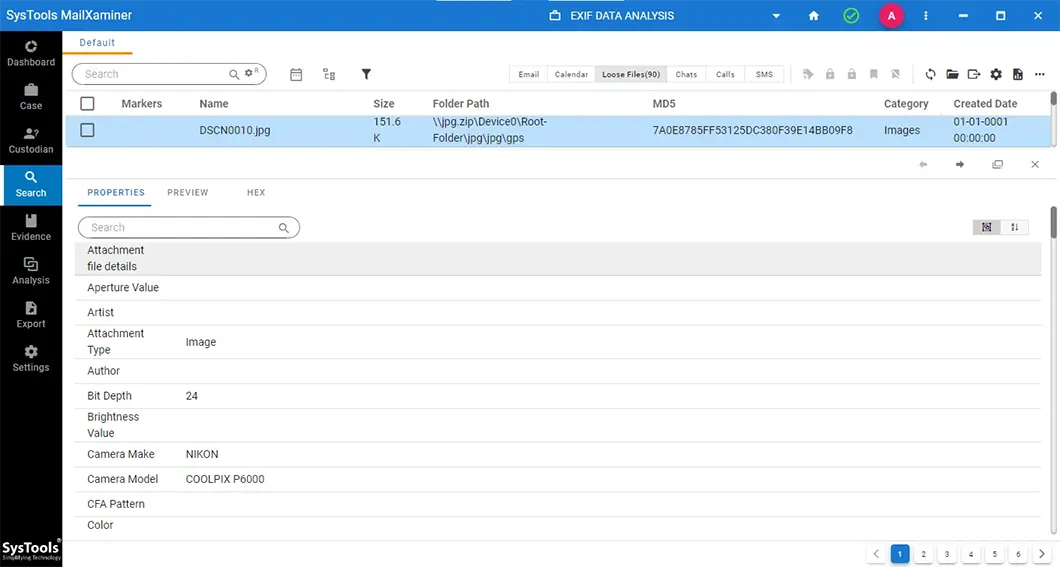
- Scroll until you see the coordinates appear.
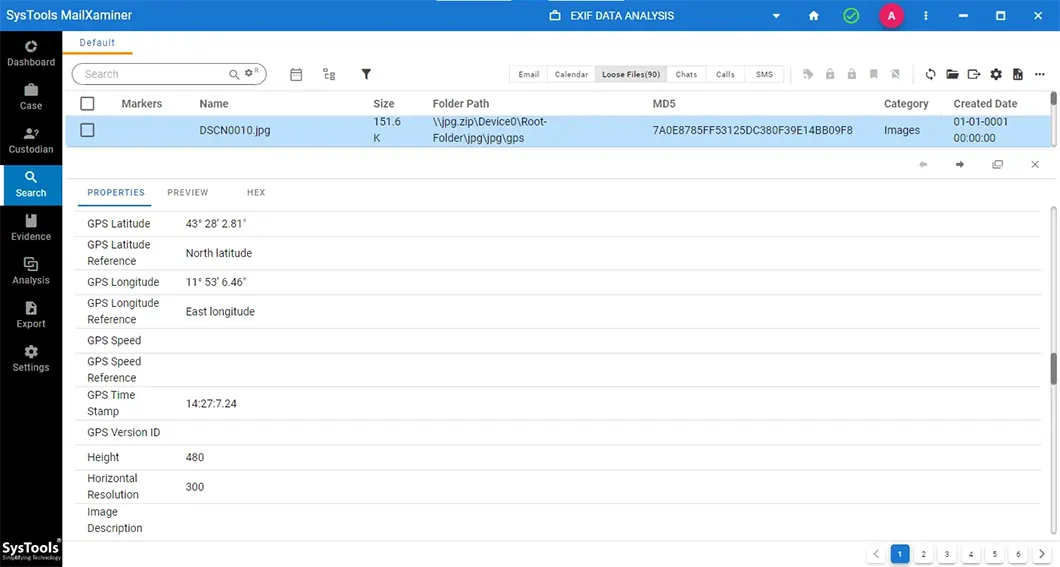
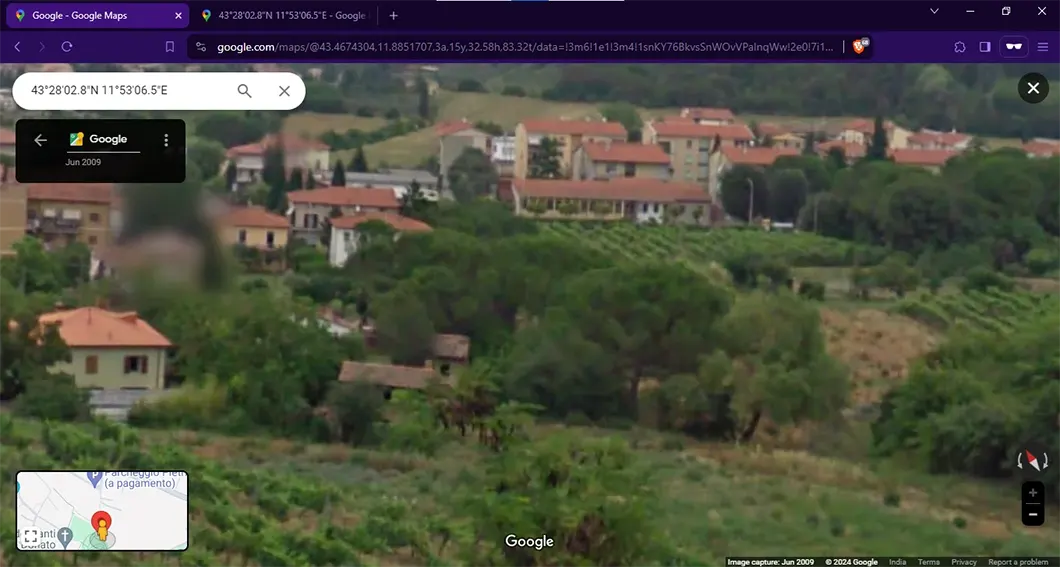
- Copy them and paste them on any free map service, like Gmail.
The advantage you get from using this tool is not limited to the ability to extract geospatial data but covers the entire scope of digital forensics as a whole.
Conclusion
After this, we hope that readers can find where the image was taken easily. As mentioned earlier, not all images may contain the EXIF data necessary to find their original location. However, every image that is geotagged can be analyzed by the tool we discussed above.
The tool will then automatically take you to the exact location where the image originated. It is preferable to the manual method, in which you have to manage all the EXIF data yourself manually.